Upscale PNG Images: Check Resolution, Transparency and Edges
Upscale PNG images with a source-first workflow. Calculate 2x and 4x dimensions, check transparent edges on light and dark backgrounds, and inspect the saved file.
 Image Enhancer Editorial Team
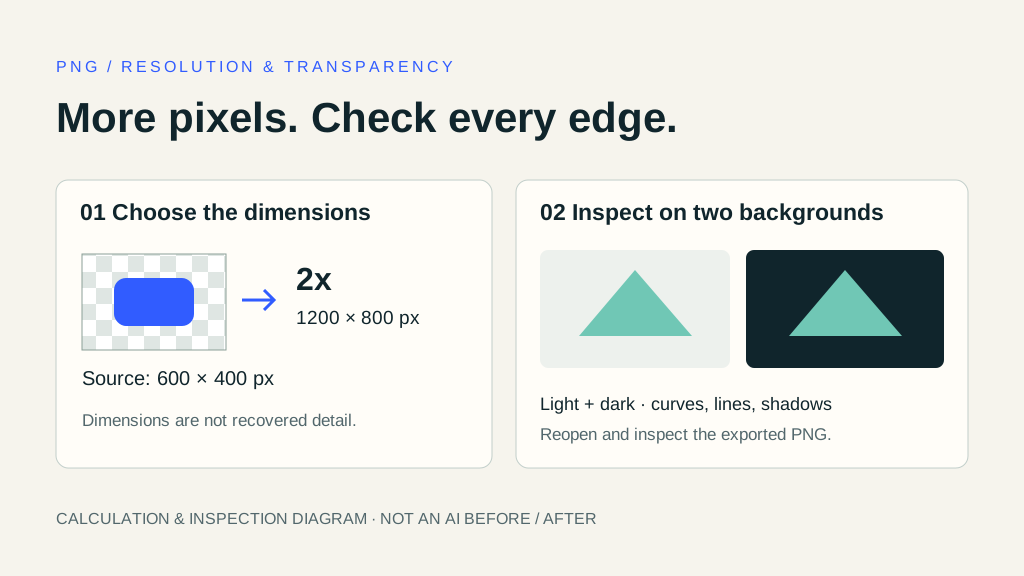
To upscale PNG images, start by checking whether you can export a larger version from the original design. A small PNG may contain a photograph, a screenshot, an illustration or a logo. The filename alone does not tell you which enlargement method will preserve the important details.
This guide focuses on pixel dimensions, transparent edges and the saved file. The cover is a calculation and inspection diagram, not an AI before-and-after result. For general scale selection, use the image enlargement guide and tool.
Identify why the PNG looks blurry
The W3C PNG specification defines a lossless raster format with optional transparency. That describes how the file stores its image; it does not guarantee that the source was sharp or large enough.
Look for the actual problem before editing:
- Too few pixels: the file is being displayed larger than its original dimensions.
- A soft source: the PNG was exported from a blurry photograph or a tiny embedded image.
- A damaged outline: a cutout has a pale fringe or an unwanted background around its subject.
- Unreadable letters: the original text has already been rasterized at a small size.
Use the screenshot quality guide for text-heavy captures. If a JPEG was converted to PNG, existing compression defects belong to the JPEG quality workflow. Changing the extension does not reverse them.
Export again from the source when possible
For a logo or diagram, locate the editable design, vector file or original presentation. Export at the required pixel dimensions instead of repeatedly resizing a small raster copy. Check linked photographs as well: a larger document cannot supply detail that is missing from an embedded image.
For a cutout, keep an editable version with its mask or layers. A white background that was already merged into the pixels is not the same as a transparent area. If the source still contains a clean mask, exporting again can avoid having to repair a fringe later.
When no editable source exists, preserve the original PNG and experiment on a duplicate. Choose a crop containing fine lines, a curved edge and any important lettering so that every version can be compared against the same reference.
Choose the scale from the required pixel dimensions
What happens to a 600 by 400 pixel image?
A 600 × 400 pixel PNG becomes 1,200 × 800 at 2x, or 2,400 × 1,600 at 4x. Width and height both multiply, so the pixel count becomes four times or sixteen times the original. These are dimension calculations, not claims of recovered detail or predicted file size.
If the destination only requires 1,200 × 800, start by comparing 2x. Enlarging to 4x and then shrinking again adds an extra processing decision without necessarily improving the result. Keep the aspect ratio unless you deliberately want to crop or distort the image.
A DPI change does not add screen detail
Changing only print-resolution metadata leaves the number of pixels unchanged. If you are preparing a physical print, calculate the required pixel count from the intended print dimensions instead. The 300 dpi image guide covers that separate task.
Check size and PNG export settings in GIMP
GIMP documents Image → Scale Image for changing pixel dimensions. Set the target width and height with their proportions linked, then compare the interpolation result. Its Scale Image manual distinguishes resampling from changing print size and explains that interpolation does not recover new detail.
Export a separate PNG using settings appropriate to the image. Check whether transparency is included when you need it. The PNG export manual describes pixel-format choices and lossless compression levels. Compression strength is a storage choice, not a sharpening control. For the broader editor workflow, see the GIMP enlargement article.
Inspect transparency and altered detail after AI processing
AI can be worth comparing for an illustration or photographic PNG when the source is too small. It can also redraw thin strokes, labels or facial details. Keep the unprocessed reference and reject a more polished result if it changes information that matters.
PNG input support does not establish that an AI service preserves the alpha channel. A downloaded file ending in .png can still have a fully opaque background. Before processing a collection of transparent assets, inspect one output in an editor that can show its transparency.
The site's image workbench accepts PNG among its supported inputs, and the illustration page explains artwork-oriented checks. This article does not promise that the existing processing workflow preserves transparent backgrounds or provides dedicated alpha controls. For an asset that must retain an exact outline, use a workflow you can verify on the exported file.
Check light and dark edges on two backgrounds
Place the result over a light background and then a dark one. A pale fringe can disappear on white but become obvious on dark material; a dark outline can behave the other way around. Check curves, hair, fine lines and partly transparent shadows at 100% and at the intended display size.
If an unwanted edge is present, compare with the source. It may have existed before enlargement. Return to the original mask or design when available, rather than blurring the whole asset to hide the border. Do not mistake a checkerboard that is painted into the image for genuine transparency.
Reopen the exported file before sharing
Check the saved output, not just the editor preview: confirm its dimensions, transparency, important text and appearance on the actual destination background. Keep the editable master separate from the distribution copy.
A larger PNG can require more storage and take longer to transfer. File size alone does not measure visible quality. If a sharing platform resizes the upload or changes its format, compare the received version with your export before making more edits to the original.
Frequently asked questions
Will converting JPEG to PNG improve quality?
It does not restore lost details. It can be useful as an intermediate format, but existing blocks and blur remain part of the image until separately addressed.
Does a different PNG compression level sharpen the image?
No. Lossless PNG compression settings change encoding behavior, not the intended decoded pixels. Other export changes, such as reducing the palette, are separate decisions that can change appearance.
Will a transparent PNG always stay transparent?
Only if the complete editing and export workflow keeps the transparency data. Check the downloaded output; the filename is not sufficient evidence.
Should I use AI on logos and small lettering?
Prefer the editable source and a larger export for exact shapes and text. If you compare AI processing, check every significant character and outline against the source rather than accepting a plausible substitute.
Related tools and guides
Use image enlargement for output dimensions, illustration enhancement for line and color checks, and the JPEG guide for compression artifacts. Return to the blog for other preparation workflows.