Improve Screenshot Quality: Keep Text and Charts Clear
Improve screenshot quality with better captures, PNG files and careful AI upscaling. Check small text and charts before sharing screenshots from a PC or phone.
 Image Enhancer Editorial Team
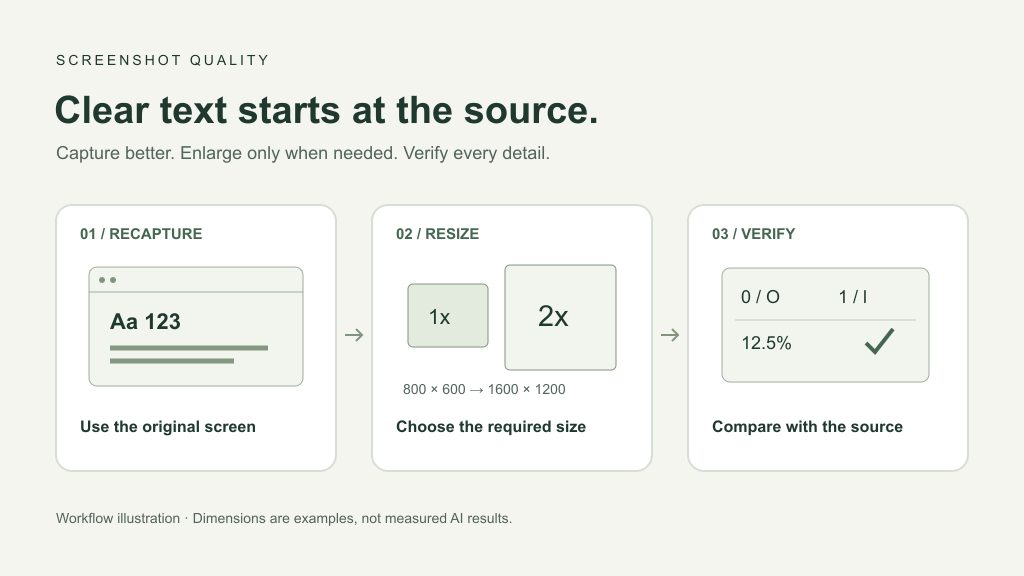
To improve screenshot quality, start with the screen you captured. If the original page or document is available, capturing it again at a readable size is usually more reliable than asking AI to reconstruct tiny letters. Screenshots record pixels; making those pixels larger does not guarantee an accurate recovery of the original text.
If you only have a small saved copy, compare modest enlargement with the original and check every important number and symbol. This guide covers text, tables and interface screenshots. For photographic content, use the separate JPEG quality guide.
The image above is a workflow illustration: recapture, enlarge if necessary, then verify text. It is not an AI before-and-after example or a measured quality result.
If the image looks worse only after sharing, use the LINE image quality checklist to compare the source, sending method and downloaded copy.
Choose the right fix before editing
| Problem | First action | Check |
|---|---|---|
| Text is tiny on the source screen | Increase the source text size and capture again | Keep the relevant lines and context visible |
| Only the saved copy is small | Find the original file; otherwise compare 2x enlargement | Pixel dimensions and letter shapes |
| It becomes blurry after sharing | Check whether file attachment preserves the original | Dimensions before and after sending |
| It looks rough in print | Consider a source PDF or larger capture | Pixels relative to the intended print size |
If the original file is sharp but its appearance in a presentation is soft, investigate the destination's resizing and compression settings. Cropping a tiny table out of a full desktop capture also leaves fewer pixels to work with. Correcting the wrong stage can make a larger file without improving readability.
Capture a better source when possible
Windows and Mac
For browser text, increase the page's text display size before capturing the relevant area. Enlarging a small embedded photograph does not increase its source detail; where permitted, obtain the original image instead.
On Windows, use Windows + Shift + S to select a capture area. On Mac, use Shift + Command + 4. See the official Microsoft Snipping Tool instructions and Apple screenshot guide for capture controls.
If you can edit the source document, consider exporting its table or chart, or sharing a PDF with selectable text. Split a long explanation into useful sections rather than squeezing an entire document into one unreadable capture. Retain headings so readers can understand what each section represents.
Phones
Use the original screenshot in your photo library rather than a copy saved from a chat. Taking a second screenshot of a small image introduces the current viewer's scale and surrounding space into the result.
If the source app supports larger text, adjust it without cutting off important content and capture again. Controls vary by device and app. Long screenshots can become difficult to read when a destination fits them into a narrow frame; separate the relevant sections and preserve their context.
Check pixels against the intended display size
A 600px-wide screenshot shown in a 1,200px-wide space is stretched to twice its width. Soft letter edges may come from that mismatch rather than a low export quality setting.
For a dimension example, 800×600px becomes 1,600×1,200px at 2x, or 3,200×2,400px at 4x. These are calculations, not measured enhancement results. Doubling both dimensions quadruples the pixel count; quadrupling them increases the count sixteenfold.
Inspect the image at 100% zoom, then at its intended viewing size. A fit-to-window preview can hide defects, while extreme zoom can encourage unnecessary sharpening of edges that look fine in normal use.
Upscale the screenshot you already have
Prepare the file
Keep an untouched original and edit a copy. Before uploading, remove unnecessary email addresses, notifications, account details and customer information. If you conceal sensitive content, reopen the exported file to confirm it is actually hidden rather than covered by a removable annotation.
Read the service's privacy information, and follow your organization's rules for confidential material. Upload only the relevant region rather than an entire desktop containing unrelated information.
Compare original size, 2x and 4x
The image enlarger lets signed-in users select a supported image and request original-size, 2x or 4x processing. Check the interface for available modes, credit costs and dimension limits. Very long screenshots or narrow crops may not fit the selected mode's requirements.
- Choose the original JPEG, PNG or WebP file.
- Compare its width and height with the destination's required dimensions.
- Consider original size if it already fits, or 2x if both dimensions are roughly half the requirement.
- Use 4x only when needed, subject to output limits and inspection.
- Download the result and compare matching areas with the original.
Original-size enhancement can still alter letter shapes. A smaller scale does not guarantee accurate content. If a crop is rejected, reconsider the capture area or source document instead of adding unnecessary padding just to bypass a limit.
Verify text and charts after processing
A visually cleaner result can still contain incorrect information. Check these details against the source screen or another reliable original:
- Similar characters such as
0andO, or1andl. - Decimal points, minus signs, percentages, units and dates.
- Fine strokes and small marks in Japanese text.
- Table boundaries, checkboxes and chart axis labels.
Reject an output that changes a number, even if it looks sharper. If the source is unreadable, do not treat a generated guess as recovered text. Keep the untouched original separately when the screenshot is needed as a record.
Save and share without adding damage
For text-heavy images, consider a lossless format such as PNG. The MDN image format guide recommends lossless encoding for screenshots and line art because edge artifacts are conspicuous. Converting an existing JPEG to PNG will not repair earlier damage.
Check the actual downloaded format. Do not assume the tool returned PNG if it offers no PNG export option. Saving a JPEG result as PNG can avoid later JPEG recompression, but cannot restore the original letters.
Open the received file and compare its pixel dimensions with the version you sent. If a service reduces images, investigate file attachments or a link to the original. When a recipient imposes a size limit, consider a relevant crop or separate sections before reducing the entire image.
Frequently asked questions
Can AI always recover unreadable screenshot text?
No. If the pixels no longer distinguish two possible characters, enlargement cannot establish which was correct. Obtain the source screen, document or a new capture. Do not present AI-generated letters as the original wording.
Will converting to PNG make it sharp?
Conversion alone does not fix blur. PNG is useful for avoiding additional lossy compression during subsequent saves. Check the source dimensions and actual readability rather than the filename extension alone.
Can I do this on a phone?
You can select the original screenshot in a browser and process it. File selection, download controls and saved-file locations vary by device. Check readability again after sending the downloaded result through another app.
Does changing to 300dpi improve the text?
Changing DPI metadata without changing pixel dimensions adds no letter detail. For printing, check the relationship between pixels and physical output size in the print resolution guide.
Related guides and references
Start with a better capture, compare only the enlargement you need, and verify text before sharing.
- Choose output dimensions with the image enlarger
- Understand interpolation and AI enlargement
- Handle JPEG compression artifacts
- Browse the enhancement guides
- Return to the image enhancer home page
Official references: Microsoft Snipping Tool, Apple screenshots, and MDN image formats.